原文链接
前言
骨架屏,就是在页面数据尚未加载前,先给用户展示出页面的大致结构,直到请求数据返回后,再渲染页面,以优化用户体验。
骨架屏在前端的应用已经很普遍了,之前接手vue的项目,没能用上,现在开发小程序,想在小程序中试一试。看着美团外卖小程序的骨架屏,很nice~
开始
没有使用骨架屏的经验,只能靠搜索引擎了。找找找....终于在网上找到一份很好的例子,作者是腾讯的,代码已经在github开源,现在介绍给大家。
首先,从github克隆项目到本地,看看效果啦~(在微信开发工具打开项目下的src目录)
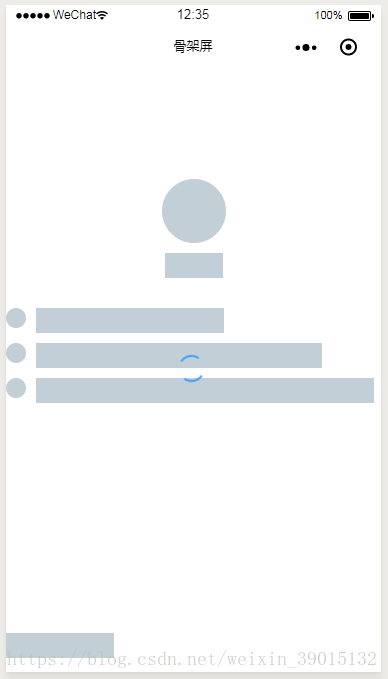
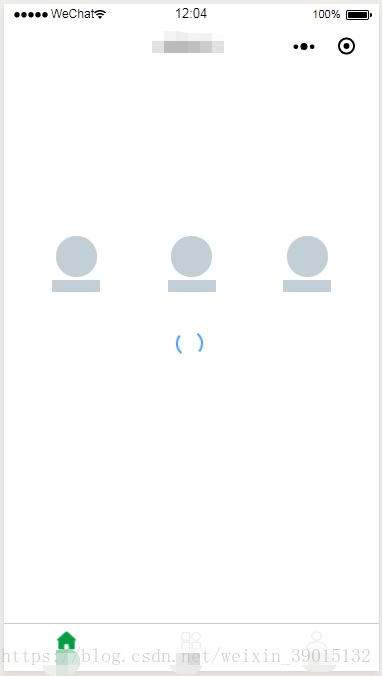
效果图(加载中):
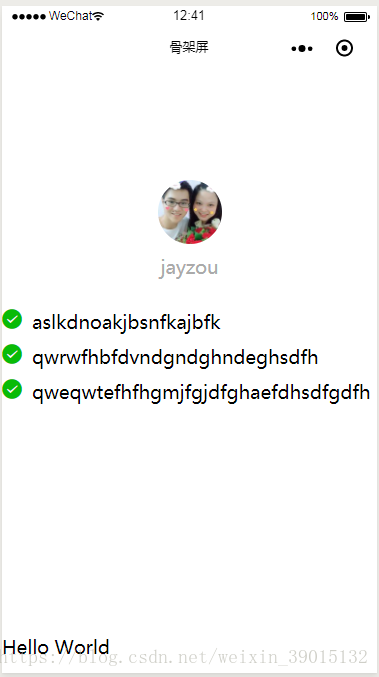
效果图(加载完毕):
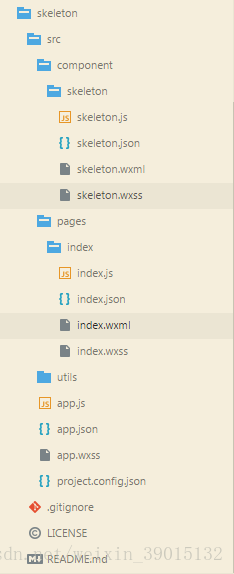
项目的目录结构:
index.wxml:
!-- 作为组件在页面中使用 --skeleton selector="skeleton"loading="spin"bgcolor="#FFF"wx:if="{{showSkeleton}}"/skeleton!--index.wxml--!-- 渲染的根节点,加上 .skeleton --view class="container skeleton" view class="userinfo" block !-- 要渲染的圆形节点,加上 .skeleton-radius -- image class="userinfo-avatar skeleton-radius" src="{{userInfo.avatarUrl}}" mode="cover"/image !-- 要渲染的矩形节点,加上 .skeleton-rect -- text class="userinfo-nickname skeleton-rect"{{userInfo.nickName}}/text /block /view view style="margin: 20px 0" view wx:for="{{lists}}" wx:key="{{index}}" class="lists" icon type="success" size="20" class="list skeleton-radius"/ text class="skeleton-rect"{{item}}/text /view /view view class="usermotto" text class="user-motto skeleton-rect"{{motto}}/text /view view style="margin-top: 200px;"aaaaaaaaaaa/view/viewindex.json:
{ // 引入骨架屏组件 "usingComponents": { "skeleton": "/component/skeleton/skeleton" }}最后来探索一下骨架屏组件的实现
skeleton.wxml:
!-- 最外层的view绑定了js中定义的宽、高以及背景颜色 --view style="width: {{systemInfo.width}}px; height: {{systemInfo.height}}px; background-color: {{bgcolor}}; position: absolute; left:0; top:0; z-index:9998; overflow: hidden;" !-- 循环,遍历绘制矩形节点,宽高参照js获取到的节点宽高,以绝对定位的方式定位 -- view wx:for="{{skeletonRectLists}}" wx:key="{{index}}" class="{{loading == 'chiaroscuro' ? 'chiaroscuro' : ''}}" style="width: {{item.width}}px; height: {{item.height}}px; background-color: rgb(194, 207, 214); position: absolute; left: {{item.left}}px; top: {{item.top}}px"/view !-- 循环,遍历绘制矩形节点,宽高参照js获取到的节点宽高,以绝对定位的方式定位 -- view wx:for="{{skeletonCircleLists}}" wx:key="{{index}}" class="{{loading == 'chiaroscuro' ? 'chiaroscuro' : ''}}" style="width: {{item.width}}px; height: {{item.height}}px; background-color: rgb(194, 207, 214); border-radius: {{item.width}}px; position: absolute; left: {{item.left}}px; top: {{item.top}}px"/view view class="spinbox" wx:if="{{loading == 'spin'}}" view class="spin"/view /view/viewskeleton.js:
Component({ // 组件对外暴露的属性 properties: { // 背景颜色 bgcolor: { type: String, value: '#FFF' }, // 渲染的根节点的类名 selector: { type: String, value: 'skeleton' }, // 加载动画 loading: { type: String, value: 'spin' } }, data: { loadingAni: ['spin', 'chiaroscuro'], systemInfo: {}, skeletonRectLists: [], skeletonCircleLists: [] }, attached: function() { //默认的首屏宽高,防止内容闪现 const systemInfo = wx.getSystemInfoSync(); // 获取系统的信息,作为skeleton的宽和高 this.setData({ systemInfo: { width: systemInfo.windowWidth, height: systemInfo.windowHeight }, // 设置动画 loading: this.data.loadingAni.includes(this.data.loading) ? this.data.loading: 'spin' }) }, ready: function() { const that = this; //绘制背景 // selectAll: 在当前页面下选择匹配选择器 selector 的所有节点。 wx.createSelectorQuery().selectAll(`.$ { this.data.selector }`).boundingClientRect().exec(function(res) { console.log(res); that.setData({ 'systemInfo.height': res[0][0].height + res[0][0].top }) }); //绘制矩形 this.rectHandle(); //绘制圆形 this.radiusHandle(); }, methods: { rectHandle: function() { const that = this; //绘制不带样式的节点 // 选择所有 .skeleton-rect的节点 wx.createSelectorQuery().selectAll(`.$ { this.data.selector } - rect`).boundingClientRect().exec(function(res) { console.log(res); // 保存数据,一维数组是节点,二维数组是节点的信息 that.setData({ skeletonRectLists: res[0] }) console.log(that.data); }); }, radiusHandle: function() { const that = this; // 同样地选择所有的 .skeleton-radius节点 wx.createSelectorQuery().selectAll(`.$ { this.data.selector } - radius`).boundingClientRect().exec(function(res) { console.log(res); that.setData({ skeletonCircleLists: res[0] }) console.log(that.data); }); }, }})核心的代码是组件的.js和.wxml文件,使用了wx.createSelectorQuery().selectAll 非常巧妙地选择到了所有要渲染的矩形和圆形节点,在页面中,使用循环,遍历出所有的节点。
总结
就是这么简单的操作,实现了我们想要的效果。有时间真的应该好好看一些优秀的源码~
最后上一张使用的效果图,要去吃饭了....
嘘寒问暖 不如打笔巨款~