阅读本博客需要对微信小程序有一个初步的理解可参照点我进行初步的了解
效果图
下面我们正式开始
第一步 查看目录结构并初步建立各个文件夹及在app.json中注册页面 不注册无法显示
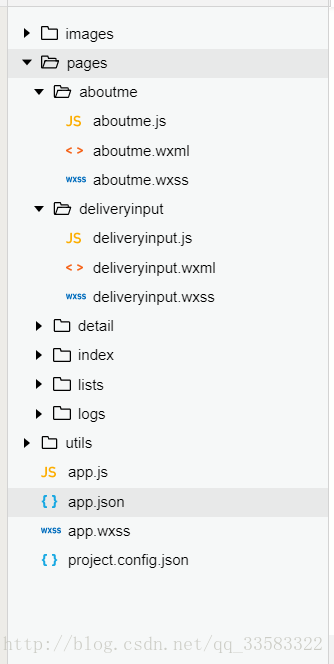
我们这里只使用images文件夹、pages下的aboutme、deliveryinput、index文件夹、以及配置根目录下app.json文件
其中images文件夹用来存储页面要显示的文件,pages中放置我们的页面文件包括(.js后台逻辑处理 .wxml前台显示页面 .wxss设计前台样式)
app.json
{//这里进行页面注册,直接写对应路径信息就行 "pages": [ "pages/deliveryinput/deliveryinput", "pages/index/index", "pages/lists/lists", "pages/logs/logs", "pages/aboutme/aboutme", "pages/detail/detail" ], "window": { "backgroundTextStyle": "light", "navigationBarBackgroundColor": "#fff", "navigationBarTitleText": "WeChat", "navigationBarTextStyle": "black" }, //这里设置页面下方的tabBar 提供跳转功能 "tabBar": { "borderStyle": "black", "color": "#000", "backgroundColor": "#fff", "selectedColor": "#0123", "list": [ { "pagePath": "pages/deliveryinput/deliveryinput", "text": "快递查询", "iconPath": "images/wuliu.png",//引用图片 "selectedIconPath": "images/wuliu.png"//选中时使用的图片 }, { "pagePath": "pages/aboutme/aboutme", "text": "关于我", "iconPath": "images/rrr.png", "selectedIconPath": "images/rrr.png" } ] }}第二步 编写aboutme页面
不废话,上代码
aboutme.wxml
!--pages/aboutme/aboutme.wxml--//微信小程序提供好多标签给开发者进行设计页面,这里偷懒统一使用view。。。(相当于div的意思)view class="about" view class="about-wei" view class="about-img"image src="{{img}}" class="in-img" background-size="cover"/image/view view class="about-title"{{title}}/view /view view class="about-intro" view{{intro}}/view /view view class="about-addr" view class="about-tab"{{connecttion}}/view view{{address}}/view view{{email}}/view view{{phone}}/view /view/viewaboutme.js
// pages/aboutme/aboutme.js//获取应用实例const app = getApp()Page({ data: {//这里是为页面显示准备数据,不建议直接写在页面里 img: '../../images/qwe.jpg', title: "马什么梅", intro: " 热爱编程,有实战项目经历,熟练掌握Java开发专业知识,有良好的沟通表达能力、理解能力及逻辑思维,能快速学习,有团队精神和集体荣誉感,能快速融入团队", connecttion: "联系方式", address:"地址:河南省宁陵县", phone:"联系电话:xxxxxxxxx", email:"邮箱:1084150741@qq.com"//欢迎大家一起讨论 }, onLoad: function () {//页面加载初始化函数 if (app.globalData.userInfo) {//获取微信账号登录。。。这里实际没用到相关的数据,纯粹为了加载下能看看装个逼。。。 this.setData({ userInfo: app.globalData.userInfo, hasUserInfo: true }) } }})aboutme.wxss
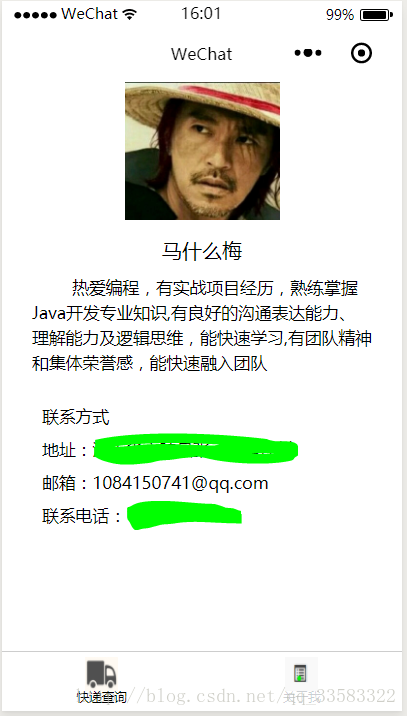
/* pages/aboutme/aboutme.wxss *///设计对应aboutme.wxml中的标签样式.about{}.about-wei{text-align: center;}.about-img{ display: block;margin: 1px auto 0;}.in-img{width: 124px;height: 110px}.about-title{display: inline-block;margin: 10px;align-items: center}.about-intro{text-indent: 2em;font-size: 16px;line-height: 1.5;margin: 0 24px }.about-addr{font-size: 16px;line-height: 2;text-indent: 2em;}.about-tab{margin-top: 20px}好,到这里我们已经完成了第一个页面的编写,页面效果图如下(-。。-)
有没有感觉很简单,哈哈
第三步 deliveryinput页面
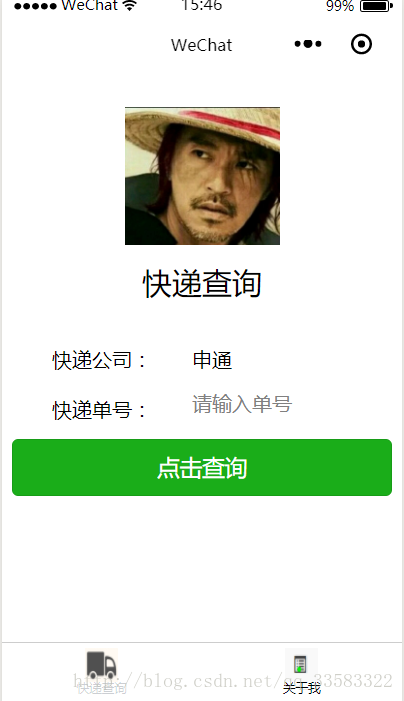
这个页面用来接收用户输入的快递类型,单号等数据,然后调用后台逻辑传递用户输入的参数给index页面的逻辑(嘘。。。使用人家的接口)
上代码
deliveryinput.wxml
!--pages/deliveryinput/deliveryinput.wxml--view class="contains" view class="about-img"image src="{{img}}" class="in-img" background-size="cover"/image/view view class="title"{{title}}/view view class="ppicker" picker bindchange="bindPickerChange" value="{{areaIndex}}" range="{{area}}" view class="inpicker"快递公司:/view {{area[areaIndex]}} /picker view class="asd" view class="input"快递单号:/view input placeholder="请输入单号" bindinput="passWdInput" / /view /viewview class="btn" navigator url="../../pages/index/index?type={{userName}}&postid={{userPwd}}" button class="loginBtn" type="primary"点击查询/button/navigator /view/viewdeliveryinput.wxss
/* pages/deliveryinput/deliveryinput.wxss */.contains{ height: 100%; display: flex; flex-direction: column; padding: 20rpx; margin-bottom: 20px}.title{ display: inline-block; margin: 10px; text-align: center; font-size: 24px;}.ppicker{ font-size: 16px;line-height: 2;text-indent: 2em;margin-top: 20px}.inpicker{ float: left}.itemView{ float: left}.asd{ margin-top: 20rpx}.input{float: left}.btn{ margin-top: 20rpx;}.about-img{ display: block;margin: 20px auto 0;}.in-img{width: 124px;height: 110px}deliveryinput.js
// pages/deliveryinput/deliveryinput.jsPage({ data: { img: '../../images/qwe.jpg', title: "快递查询", areaIndex: 0, area: ['点击选择', '申通', 'EMS', '顺丰', '圆通', '中通', '韵达', '天天', '汇通', '全峰', '德邦', '宅急送'], realvalue: ['', 'shentong', 'ems', 'shunfeng', 'yuantong', 'zhongtong', 'yunda', 'tiantian', 'huitongkuaidi', 'quanfengkuaidi', 'debangwuliu', 'zhaijisong'] }, //获取快递公司 bindPickerChange: function (e) { console.log(this.data.realvalue[e.detail.value]) this.setData({ //**重点**!!!使用setData重新给data赋值或新建data userName: this.data.realvalue[e.detail.value], areaIndex: e.detail.value }) }, //获取快递单号 passWdInput: function (e) { this.setData({ userPwd: e.detail.value }) },})上图
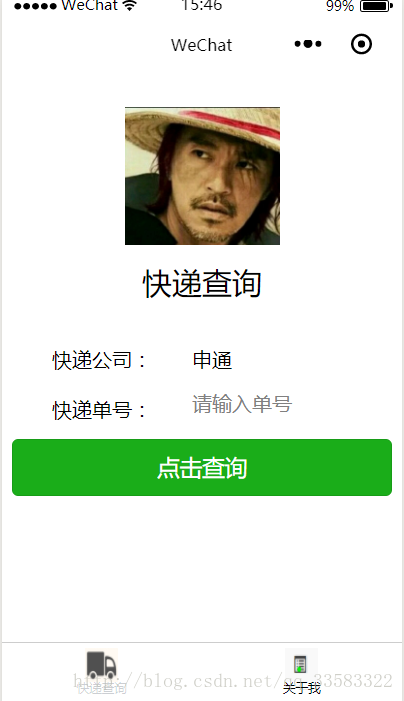
第四步 编写index页面
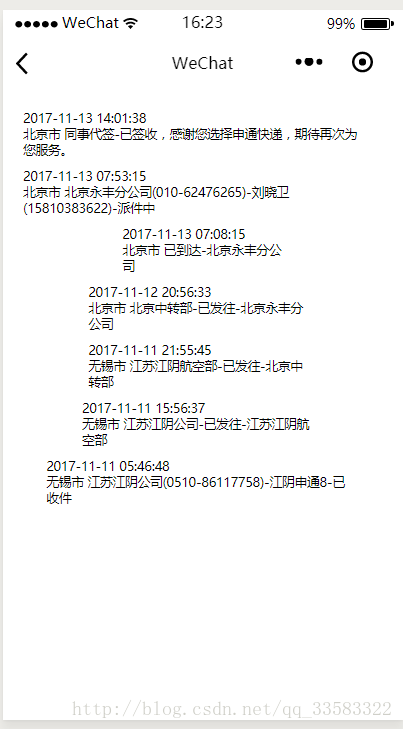
这个页面用来显示查询到的信息
index.wxml
!--index.wxml--view class="container" !--循环输出列表begin-- view wx:for="{{contexts}}" wx:key="key" view class="infor" text space="flase"{{item.ftime}}{{item.context}}/text /view /view !--循环输出列表end--toast hidden="{{toastHidden}}" bindchange="toastChange" duration="5000"单号填写错误!/toast//错误提示/view index.wxml
.container { height: 100%; padding: 20rpx;}.infor { font-size: 10px; width: 90%; padding: 20rpx 0 0 20rpx;}index.js
//index.js//获取应用实例const app = getApp()Page({ data: { contexts: "ss", toastHidden: true }, //事件处理函数 bindViewTap: function () { wx.navigateTo({ url: '../logs/logs' }) }, toastChange: function () { this.setData({ toastHidden: true }) }, onLoad: function (options) { wx.getNetworkType({ success: function (res) { // 返回网络类型, 有效值: // wifi/2g/3g/4g/unknown(Android下不常见的网络类型)/none(无网络) var networkType = res.networkType console.log(networkType) } }) var that = this wx.request({ url: 'http://www.kuaidi100.com/query', //对对对就是在这里使用的人家的接口 data: {//这里是参数 type: options.type, postid: options.postid }, header: { 'content-type': 'application/json' // 默认值 }, success: function (res) { if (res.data.message=='参数错误') { that.setData({ toastHidden: false }) } console.log(res.data.message) that.setData({ contexts: res.data.data }) } }) },})最后查询到的信息显示,哈哈,巨丑有没有