


当你的小程序有用户提交(评论、文章、图片)时,如果你的代码没有过滤敏感词汇,将会审核不通过,幸好官方提供了API,方便了很多,废话不多说,干!
本文只有文字过滤
本文采用的是云函数方法
为了不浪费各位的时间特此说明
一、启动微信开发者工具
1、在项目中新建一个文件夹例如functions,
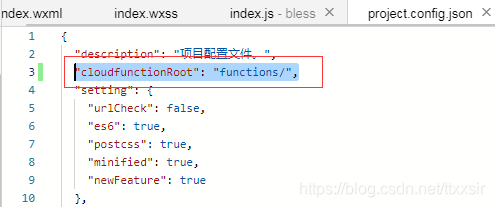
2、找到项目中的prject.config.json配置文件,加入cloudfunctionRoot:'文件夹名',如下图:
3、右键functions文件夹名,新建Node.js云函数,起名为:msgSC
// 云函数入口文件 index.jsconst cloud = require('wx-server-sdk')cloud.init()// 云函数入口函数exports.main = async (event, context) => { const wxContext = cloud.getWXContext() try { const result = await cloud.openapi.security.msgSecCheck({ content: event.text }) if (result && result.errCode.toString() === '87014'){ return { code: 500, msg: '内容含有违法违规内容', data: result } }else{ return { code: 200, msg: 'ok', data: result } } } catch (err) { // 错误处理 if (err.errCode.toString() === '87014') { return { code: 500, msg: '内容含有违法违规内容', data: err } } return { code: 502, msg: '调用security接口异常', data: err } }}4、新建config.json
//config.json 这条注释请不要复制到代码中{ "permissions": { "openapi": [ "security.msgSecCheck" ] }}5、右键msgSC函数名=》上传并部署,不上传node-modules
6、page中调用
bindbt: function () { that = this; wx.cloud.init(); wx.cloud.callFunction({ name: 'msgSC', data: { text: "需要检测的内容" } }).then((res) => { if (res.result.code == "200") { //检测通过 } else { //执行不通过 wx.showToast({ title: '包含敏感字哦。', icon: 'none', duration: 3000 }) } }) }二、总结一下几个关键点
1、prject.config.json配置文件
2、config.json中的openapi的值
3、try和catch一定要加入判断
小程序


