微信小程序转发朋友圈
接触过微信小程序的都应该知道微信小程序只开辟了一个转发给好友和群的api,如果想发送到朋友圈,方法大同小异,无非就是保存图片到本机 然后在进行朋友圈发表,话不多说,先上图,然后上代码。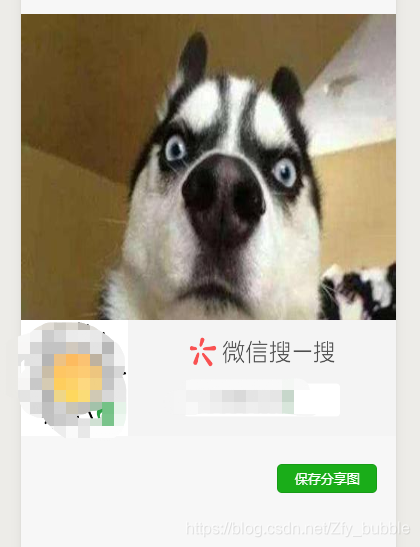
1.首先需要一个保持一般分享图和打开地址的按钮,因为在用户在取消允许保存图片到手机的时候,在调用是调用不起来的 这时候就用到wx.authorize这个api 具体看官方文档
①.wxml<canvas canvas-id="myCanvas" style="width:{{Width}}px;height:{{Height}}px;"/><button type='primary' size='mini' bindtap='save' class='baocun' wx:if="{{!state}}">保存分享图</button><button bind:tap="addressAgain" type='primary' size='mini' bindopensetting="addressAgain" class='baocun1' wx:if="{{state}}"> 打开地址</button> 2.样式( 这里也是大概写了写 需要更好 看的样式自己微调就啊好了 )
②.wxsscanvas{ position: fixed; top: 0;}image{ margin: 10% 10%;}.baocun{position:absolute;right:5%;top:76%;}.baocun1{position:absolute;right:5%;top:76%;}3.具体的实现流程,如有不懂可留言
③.js// pages/img/img.jsPage({ /** * 页面的初始数据 */ data: { state: false, Width: '', Height: '', imagePath: '' }, /** * 生命周期函数--监听页面加载 */ onLoad: function (options) { //进入页面是否授权,如果没授权的话授权 let _this = this wx.getSetting({ success(res) { console.log(res) //授权,如果取消授权的话 显示打开设置,进行授权,否则没有办法进行下一步 if (!res.authSetting['scope.writePhotosAlbum']) { wx.authorize({ scope: 'scope.writePhotosAlbum', success() { console.log('授权成功') _this.share() }, fail() { //state默认为false 保存分享图显示 _this.setData({ state: true }) } }) }else{ _this.share() } } }) }, share: function () { var that = this //获取系统信息,具体的属性请前往微信小程序官网查看 wx.getSystemInfo({ success: res => { console.log(res); that.setData({ Width: res.screenWidth, Height: res.screenHeight }) } }) var qrcode = './erweima.png'//二维码图片一般为网络图片后台生成 var bgImgPath = './two.jpg'//首先你需要准备一张背景图 var width = that.data.Width var height = that.data.Height const ctx = wx.createCanvasContext('myCanvas')//创建 canvas 绘图上下文 ctx.drawImage(bgImgPath, 0, 100, width, height / 2) //将背景图绘制到画布中 ctx.drawImage(qrcode, 0, height / 2, width, height / 7) ctx.clip(); ctx.draw() setTimeout(function () { //当前画布指定区域的内容导出生成指定大小的图片 wx.canvasToTempFilePath({ x: 0, y: 100, width: that.data.Width, height: 470, destWidth: that.data.Width, destHeight: 470, canvasId: 'myCanvas', fileType: 'png', quality: 1, success: function (res) { console.log(res.tempFilePath); /* 这里 就可以显示之前写的 预览区域了 把生成的图片url给image的src */ that.setData({ imagePath: res.tempFilePath, }) }, fail: function (res) { console.log("失败" + res) } }) }, 200) }, save: function () { var that = this //保存图片 wx.saveImageToPhotosAlbum({ filePath: that.data.imagePath, success: function (res) { console.log(res) wx.showModal({ content: '图片已保存到相册,赶紧晒一下吧~', showCancel: false, confirmText: '好的', confirmColor: '#333', success: function (res) { if (res.confirm) { console.log('用户点击确定'); wx.navigateBack({ delta: 1 }) } } }) }, fail: function (res) { console.log('保存图片失败') } }) }, addressAgain: function () { const _this = this wx.openSetting({ success(res) { if (!res.authSetting["scope.writePhotosAlbum"]) { console.log('状态不对') } else { _this.setData({ state: false }) _this.share() } }, }) }})博主也是刚接触微信小程序不久 ,希望和小伙伴共同学习 共同努力。
如有不全 请留言博主肯定第一时间来进行更新和改写