一.开发平台和前期准备
1.前端工具:微信web开发者工具
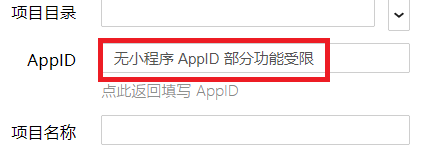
打web开发者工具,新建小程序项目,目录和名称自己随意填,AppID点击体验:小程序
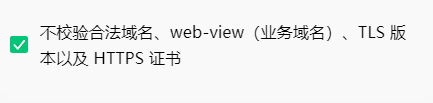
小程序打开后,点击右上方的详情,项目设置,勾选不校验xxxxx
2.后台开发工具:eclipse
eclipse要求是java ee版的,并配置好tomcat,后面需要创建Dynamic Web Project
3.服务器:tomcat
4.数据库:mysql
二.目录截图
1.微信开发者工具目录截图
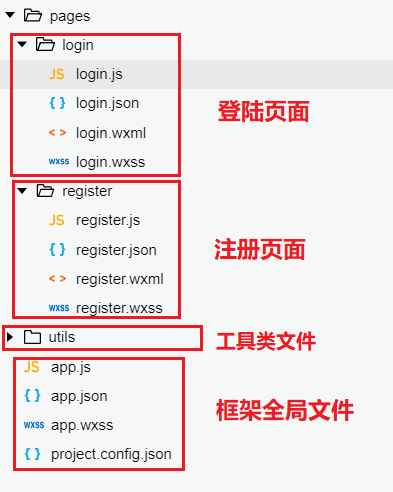
其中,.wxml 后缀文件相当于网页的HTML,.wxss文件相当于网页的css,.js 后缀文件是脚本逻辑文件,.json 后缀的 是JSON 配置文件,每一个页面都必定包含这四类文件!
2.eclipse目录截图
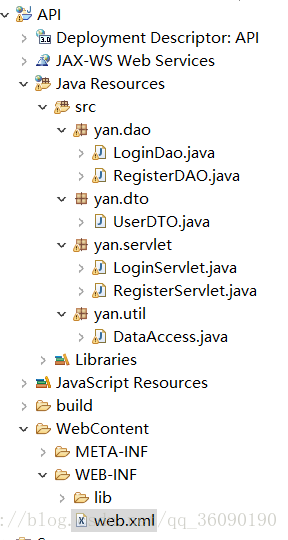
简单直白的讲就是,xxxServlet会接收微信小程序传过来的请求,然后xxxServlet会调用xxxDao完成请求,而无论是xxxServlet还是xxxDao都会调用xxxDTO来完成函数的调用,util是工具包,这包只有一个类DataAccess,该工具类是为了方便链接数据库。毫无疑问,一个完整的小程序,不会只向服务器发送一个请求,那么这时候我们就需要用到web.xml文件来控制请求的跳转了。
当然,我们还可以用SSM框架或者SSH框架来实现,但需要导入各种jar包等等一系列操作,并不利于初学者掌握,有兴趣的可以自己学习!
三.微信开发者工具
1.login.wxml
<view class="content"> <view class="account"> <view class="title">账号</view> <view class="num"><input bindinput="accountInput" placeholder="用户名/邮箱/手机号" placeholder-style="color:#999999;"/></view> </view> <view class="hr"></view> <view class="account"> <view class="title">密码</view> <view class="num"><input bindblur="pwdBlur" placeholder="请输入密码" password placeholder-style="color:#999999;"/></view> </view> <view class="hr"></view> <button class="btn" bindtap='login' type="primary">登录</button></view><view>{{message}}</view>2.login.wxss
.content{ margin-top: 40px;}.account{ display: flex; flex-direction: row; padding-left: 20px; padding-top: 20px; padding-bottom: 10px; width: 90%;}.title{ margin-right: 30px; font-weight: bold;}.hr{ border: 1px solid #cccccc; opacity: 0.2; width: 90%; margin: 0 auto; background-color: red;}.btn{ width: 90%; margin-top:40px; color: #999999;}3.login.js
Page({ //定义全局变量data data: { account: "", password: "", message:"" }, //处理accountInput的触发事件 accountInput:function(e){ var username = e.detail.value;//从页面获取到用户输入的用户名/邮箱/手机号 if (username != ''){ this.setData({ account: username });//把获取到的密码赋值给全局变量Date中的password } }, //处理pwdBlurt的触发事件 pwdBlur:function(e){ var pwd = e.detail.value;//从页面获取到用户输入的密码 if (pwd != ''){ this.setData({ password: pwd });//把获取到的密码赋值给全局变量Date中的password } }, //处理login的触发事件 login: function (e) { wx.request({ url: 'http://localhost:8080/API/login',//后面详细介绍 //定义传到后台的数据 data: { //从全局变量data中获取数据 account: this.data.account, password: this.data.password, }, method: 'get',//定义传到后台接受的是post方法还是get方法 header: { 'content-type': 'application/json' // 默认值 }, success: function (res) { console.log("调用API成功"); console.log(res.data.message); if (res.data.message=="ok"){ wx.showToast({ title: '登陆成功', }) } else{ wx.showModal({ title: '提示', content:'用户名或者密码错误', showCancel:false }) } }, fail: function (res) { console.log("调用API失败"); } }) }})其中,url:'http:localhost:8080/API/login',localhost:8080,只要tomcat默认安装完成,端口没有改就是这个了,API是项目的名称,login是项目文件web.xml中的url-pattern的属性名,url很重要,一定要确保自己没有填错,不然就连接不了服务器了
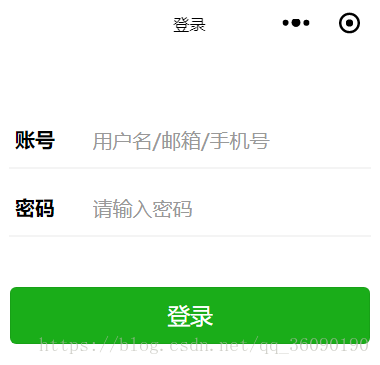
4.登陆图
5.register.wxml
<!--pages/register/register.wxml--><view class="content"> <view class="account"> <view class="title">账号</view> <view class="num"><input bindinput="accountInput" placeholder="用户名/邮箱/手机号" placeholder-style="color:#999999;"/></view> </view> <view class="hr"></view> <view class="account"> <view class="title">密码</view> <view class="num"><input bindblur="pwdBlur" placeholder="请输入密码" password placeholder-style="color:#999999;"/></view> </view> <view class="hr"></view> <button class="btn" type="primary" bindtap="register">注册</button></view>6.register.wxss
/* pages/register/register.wxss */.content{ margin-top: 40px;}.account{ display: flex; flex-direction: row; padding-left: 20px; padding-top: 20px; padding-bottom: 10px; width: 90%;}.title{ margin-right: 30px; font-weight: bold;}.hr{ border: 1px solid #cccccc; opacity: 0.2; width: 90%; margin: 0 auto;}.see{ position: absolute; right: 20px;}.btn{ width: 90%; margin-top:40px; color: #999999;}.operate{ display: flex; flex-direction: row;}.operate view{ margin: 0 auto; margin-top:40px; font-size: 14px; color: #333333;}.register{ display: flex; flex-direction: row; margin-top:150px;}.register view{ margin: 0 auto;}7.register.js
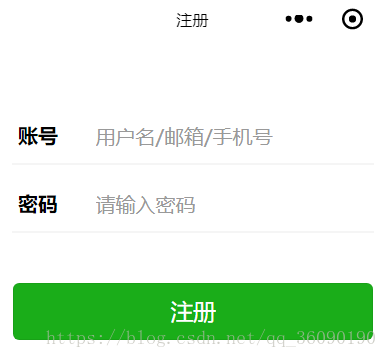
// pages/register/register.jsPage({ /** * 页面的初始数据 * data为全局变量 */ data: { account: "", password: "" }, /** * 生命周期函数--监听页面加载 */ onLoad: function (options) { }, /** * 生命周期函数--监听页面初次渲染完成 */ onReady: function () { }, /** * 生命周期函数--监听页面显示 */ onShow: function () { }, /** * 生命周期函数--监听页面隐藏 */ onHide: function () { }, /** * 生命周期函数--监听页面卸载 */ onUnload: function () { }, /** * 页面相关事件处理函数--监听用户下拉动作 */ onPullDownRefresh: function () { }, /** * 页面上拉触底事件的处理函数 */ onReachBottom: function () { }, /** * 用户点击右上角分享 */ onShareAppMessage: function () { }, //处理accountInput的触发事件 accountInput: function (e) { var username = e.detail.value;//从页面获取到用户输入的用户名/邮箱/手机号 if (username != '') { this.setData({ account: username });//把获取到的密码赋值给date中的password } }, //处理pwdBlur的触发事件 pwdBlur: function (e) { var pwd = e.detail.value;//从页面获取到用户输入的密码 if (pwd != '') { this.setData({ password: pwd });//把获取到的密码赋值给date中的password } }, //处理register的触发事件 register: function (e) { wx.request({ url: 'http://localhost:8080/API/register', //定义传到后台的数据 data: { //从全局变量data中获取数据 account: this.data.account, password: this.data.password }, method: 'get',//定义传到后台接受的是post方法还是get方法 header: { 'content-type': 'application/json' // 默认值 }, success: function (res) { console.log("调用API成功"); wx.switchTab({ url: '../login/login' // 注册成功,跳转到登陆页面 }) }, fail: function (res) { console.log("调用API失败"); } }) }})8.注册图
9.app.json
{ "pages": [ "pages/login/login", "pages/register/register" ], "window": { "backgroundTextStyle": "light", "navigationBarBackgroundColor": "#fff", "navigationBarTitleText": "登录", "navigationBarTextStyle": "black" }, "tabBar": { "list": [ { "pagePath": "pages/login/login", "text": "登陆" }, { "pagePath": "pages/register/register", "text": "注册" } ] }}10.小结
以上部分是一个完整的微信小程序的前端部分,对于有一定HTML和CSS基础的人,应该不难看懂,假如看不懂,可以先去看看微信小程序开发文档