


自己写微信小程序MQTT模拟器
陈拓 chentuo@ms.xab.ac.cn 2019.10.6/2019.10.11
1. MQTT模拟器体验
在自己写MQTT模拟器之前先从网上安装一个现成的体验一下,这可以先看看我之前写的文章《微信小程序MQTT模拟器阿里云物联网平台测试》,在下面的网址可以找到这篇文章:
https://mp.csdn.net/postedit/102216865
https://zhuanlan.zhihu.com/p/84810734
下面我们自己写一个MQTT模拟器实现这些功能。
2. 创建新项目
2.1 打开微信开发者工具,新建项目

填写你的AppID,新建。
在默认情况下,项目路径为C:UsersAdministratorWeChatProjects。
2.2 准备图片
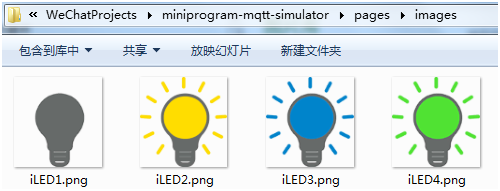
放在pages下的images目录中。
2.3 改写系统生成的代码
2.3.1 改写app.json
{
"pages": [
"pages/index/index",
"pages/logs/logs"
],
"window": {
"backgroundTextStyle": "light",
"navigationBarBackgroundColor": "#fff",
"navigationBarTitleText": "我的MQTT模拟器",
"navigationBarTextStyle": "black"
},
"sitemapLocation": "sitemap.json"
}
只改“我的MQTT模拟器”这里。
2.3.2 下载支持MQTT协议的js库和支持sha1加密的库
- 下载mqtt.js
https://github.com/mqttjs/MQTT.js
或者下载mqtt.min.js
https://unpkg.com/mqtt@3.0.0/dist/mqtt.min.js
mqtt.min.js小一些。
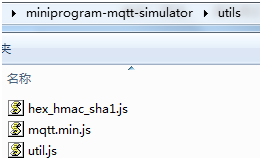
- 下载hex_hmac_sha1.js
https://github.com/xihu-fm/aliyun-iot-client-sdk/tree/master/lib
两个js文件都放在utils目录下:
2.3.3 改写index.wxml
<!--index.wxml-->
<view>
<view class="main-center">
<image src="{{imageUrl}}" class="ledinfo-avatar"></image>
<view class="ledinfo-values">
<text>湿度:</text><text>{{humidity}}</text><text>%</text>
<text>温度:</text><text>{{temperature}}</text><text>℃</text>
</view>
</view>
<text class='subheading'>设备身份三元组</text>
<view style='margin-top: 20rpx;'>
<view class='connect-info background-white'>
<text class='text'>productKey:</text>
<input class='input' name='productKey' placeholder='替换'
bindinput='productKeyInput'/>
</view>
<view class='connect-info background-white'>
<text class='text'>deviceName:</text>
<input class='input' name='deviceName' placeholder='替换'
bindinput='deviceNameInput'/>
</view>
<view class='connect-info background-white'>
<text class='text'>deviceSecret:</text>
<input class='input' name='deviceSecret' placeholder='替换'
bindinput='deviceSecretInput'/>
</view>
</view>
<view class="buttons">
<view class="button-container" bindtap='online'>
<text class="button">设备上线</text>
</view>
<view class="button-container" bindtap='publish'>
<text class="button">上报数据</text>
</view>
<view class="button-container" bindtap='event'>
<text class="button">告 警</text>
</view>
<view class="button-container" bindtap='service'>
<text class="button">订阅主题</text>
</view>
<view class="button-container" bindtap='offline'>
<text class="button">设备下线</text>
</view>
</view>
<text class='subheading'>设备日志</text>
<view style='margin-top: 20rpx;'>
<view class='deviceState background-white'>
<text class='text'>{{deviceState}}</text>
</view>
</view>
<view class='devicelog'>
<text>{{deviceLog}}</text>
</view>
</view>
2.3.4 改写index.wxss
/**index.wxss**/
page {
background-color: rgb(240, 240, 240);
font-size: 26rpx;
}
.main-center {
display: flex;
flex-direction: column;
align-items: center;
}
.connect-info {
display: flex;
flex-direction: row;
margin-top: 1rpx;
height: 60rpx;
}
.background-white {
background-color: #FFF;
}
.buttons {
display: flex;
flex-direction: row;
justify-content: space-between;
align-items:center;
margin-left: 10rpx;
margin-right: 10rpx;
margin-top: 30rpx;
margin-bottom: 30rpx;
}
.button {
line-height: 60rpx;
}
.button-container {
margin-top: 0px;
border: 1px solid #aaa;
width: 140rpx;
height: 60rpx;
border-radius: 5px;
text-align: center;
}
.ledinfo-values {
color: #92ADF0;
margin: 20rpx;
}
.ledinfo-avatar {
width: 128rpx;
height: 128rpx;
margin: 20rpx;
}
.subheading {
color: rgb(128, 128, 128);
margin: 20rpx;
}
.text {
width: 220rpx;
height: 30rpx;
margin-left: 20rpx;
margin-top: 10rpx;
}
.input {
width: 100%;
height: 30rpx;
margin-left: 20rpx;
margin-top: 10rpx;
color: rgb(128, 128, 128);
}
.deviceState {
color: #1d953f;
}
.devicelog {
margin-top: 20rpx;
word-break:break-all;
color: #426ab3;
}
2.3.5 改写index.js
//index.js
// 设备身份三元组


